Friday, October 30, 2015

Weed Bacon Recipe


8 strips of the best bacon you can buy (if you’re wasting so much weed you may as well go all out)
1/2 oz of finely ground cannabis
Step 1: Place your bacon on a dish. Rub as much marijuana as you can into the bacon (sort of like you are marinating a steak).
Step 2: Place your bacon on a small frying pan. Cook for 5 minutes on low.
Step 3: Sprinkle the remainder of your marijuana onto the bacon. Cook on low for 60 minutes. You want to try and cook the bacon at the lowest possible temperature for the greatest amount of time.
Step 4: Place your bacon onto paper towels and dab off the bacon grease.
Step 5: You are now in heaven. Enjoy your Weed Bacon.

How To Make Cannabis Sugar Recipe

Use Cannabis sugar in any way you would use regular sugar. I like to add it to my coffee, iced tea, hot tea, oatmeal, cereal, on a halved grapefruit, in a fruit salad & anywhere else where I would use granulated sugar. Keep a container at your desk at work or package in single serving sized bags for convenience.

 Place 1 Cup of granulated sugar in a mixing bowl. Add 1 Tablespoon of tincture. Mix well to fully incorporate tincture into sugar. Mixture will still be grainy. This is fine.
Spread the mixture onto a baking sheet pan in a thin layer ****
Place in a 200 degree F oven for 30 minutes. This will evaporate the alcohol from your sugar.
Remove from oven and allow to completely cool. Sugar will be clumped up on your baking sheet, this is normal
Place clumped sugar in a sieve and press through with a metal spoon to re-granulate the sugar
Place sugar in an airtight container for storage

CannaCrack Recipe

CannaCrack Ingredients

1/3 Cup – Cannabutter
9 Cups – Chex Cereal
1 Cup – Semisweet Chocolate Chips
½ Cup – Peanut Butter
1 tsp – Vanilla Extract
1 ½ Cups – Powdered Sugar

How To Make CannaCrack Edibles

  1. Place the Cereal into a 1 Gallon Ziplock Freezer Bag
  2. In a saucepan and on Medium heat, add everything except the Powdered Sugar.  Stir until melted and combined
  3. Pour the Chocolate mixture onto the Cereal inside the Ziplock Bag.  Seal the bag and shake it until all the Cereal is coated with the Chocolate mixture.  Once the Cereal is coated, pour the Powdered Sugar into the Ziplock Bag, seal it, and shake it until the Powdered Sugar has coated everything
  4. Let cool, store in the same Ziplock Bag, and eat with caution

Cannabis Vodka Recipe

1/4 oz. of stockpiled cannabis stems from breaking up buds.
Vodka (any kind should do)
 Glass container

Directions

Place all stockpiled stems in a jar. Pour in your vodka, just enough to fully submerge the stems. Let set in a dark place for about a week. After that, you will need to strain out the stems. A great trick is to make tea type bags out of coffee filters and stems for easy removal.

Tuesday, May 12, 2015

Marijuana: Pot Popcorn Recipe

Makes 12 cups
INGREDIENTS
¼ cup Cannabutter melted
½ cup popcorn kernels
¼ cup canola or vegetable oil
Kosher salt, to taste
PROCEDURE
Heat the oil in a large stock pot over medium-high heat. Place 2–3 kernels in the oil and cover the pot. When these kernels pop, add the rest of the kernels in an even layer. Cover the pot and let pop, shaking gently to ensure all kernels pop.When popping slows to several seconds between kernels, remove the pan from heat.
Add melted cannabutter and mix well.
Remove from pan and serve warm.

Marijuana Monster Cookies Recipe

Ingredients

1 stick (1/2 cup, 115 g) of Cannabutter softened
3 eggs
1 cup granulated sugar
1 1/4 cup packed light brown sugar
1 (12-ounce) jar of peanut butter
1/2 teaspoon vanilla extract
1/2 teaspoon salt
2 teaspoon baking soda
4 1/2 cup quick-cooking oatmeal (not instant)
1/2 cup chocolate chips
1/2 cup multi-colored chocolate candies 
1/4 cup raisins (optional)  


Easy Directions

Preheat the oven to 350 degrees, and line your cookie sheet(s) with parchment paper.

Combine the eggs and sugars in a giant mixing bowl, and mix well.  Now throw in the salt, vanilla, peanut butter, and the softened Cannabutter.  Keep mixing.  Add the remaining ingredients: baking soda, oatmeal, chocolate chips, candies, and raisins. Make sure everything is thoroughly incorporated before tablespoon-dropping balls of cookie dough 2 inches apart onto the lined cookie sheet(s).

Bake for 8-10 minutes, watch closely, and do NOT overbake!  

When done, remove cookies from oven and let stand for about 3 minutes before transferring to wire racks to cool.  

Makes approximately 36 Marijuana MONSTER Cookies per batch!  Enjoy!

Kief Hard Candies Recipe


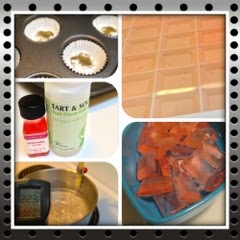
I had a request for my recipe for Hash Hard Candies.  To be honest this recipe is just the recipe fromLorAnn Oils with the addition of some decarboxylated kief hash.  I've used their flavorings and recipe for awhile and have been pretty happy with my results.  Check out their website if you want to purchase LorAnn Oils candy making supplies.

So here's what you will need for this recipe:
  • A Candy Thermometer (absolutely necessary)
  • A heat gun (recommended but not necessary if you have a reliable candy thermometer)
  • A heavy pot for cooking
  • Hard candy mold or mini muffin pan with foil liners
  • Patience and lots of time!
  • 2 Cups of Sugar
  • 2/3 Cup of Corn Syrup
  • 3/4 Cup of water
  • 1 dram (1 small bottle) Candy flavoring oil
  • 1 teaspoon Tart n' Sour flavoring
  • Decarboxylated kief (amount will depend on how strong your dosing your candies)  This time I used 1/8th gram per candy in my mini muffin tin.
  • extra sugar for dusting your finished candies
Ok so here's the thing with making hard candies, you have have have to be patient.  This process takes a long time and if you try to speed it up you will run the very real risk of scalding your sugar and ruining the whole batch, so please be sure you have the time before beginning this process.

How to do it:
  1. Spray your mold or muffin tin with a very light shot of cooking spray.
  2. Measure out your desired dosage of decarboxylated kief and add that to each section in the muffin tin or mold
  3. Add the Sugar, Corn Syrup, & Water to your heavy pan. DO NOT STIR!
  4. Place your candy thermometer in your pan.  Be sure that it doesn't rest on the bottom of your pan if it does, it will break and ruin your thermometer and your candy.
  5. Place your pan on medium heat.  
  6. Pull up a chair and be prepared for the wait.  Watch your candy  in the pot, but do not stir it or turn your heat up past medium. 
  7. Watch for the sugar mixture to begin to boil.  Now allow it to boil together until it reaches 300 degrees F (hard crack stage).  This takes anywhere from 20-40 minutes depending on your oven.  Here's where the heat gun comes in handy.  I use it to check the temperature of the boiling candy in different parts of the pan.  I do this throughout the boiling process.  Inevitably there will be a hot and cool spot in the pan.  When any one spot hits 300 degrees F immediately remove the pan from the burner.
  8. Quickly add your flavoring and Tart 'n Sour.   It will incorporate with the boiling action of the candy mixture. DO NOT STIR! Stirring will create bubbles in your candy. 
  9. Add your candy mixture to your prepared molds.  I use a metal tablespoon and quickly spoon it into the mini muffin tin.  Whatever is left over I pour into one of my hard candy molds. (Be sure you are only using molds that are rated for high heat.  Chocolate molds are NOT and WILL MELT if you add this molten sugar into them! Ruins your mold and your candies too!)
  10. Allow your candies to cool completely
  11. Carefully unmold your candy
  12. In a small bowl add about 1/4 Cup of granulated sugar.
  13. Place each candy into sugar and flip the candy over so both sides are coated with sugar.  You may spray a fine mist of water on the candies to help the sugar to adhere.
  14. Place candies on a plate and allow to dry with the sugar coating in place.
  15. Package and enjoy your Hash Hard Candies.
***Please note you are working with REALLY HOT sugar and this can burn really bad.  Use extreme care to keep this away from your skin!

OK so I hope you have fun making your own Hard Hash Candies, just remember to have lots of patience & time.  And again please be very careful.  That molten sugar can do a lot of damage to your skin.  I recommend doing this entire project BEFORE medicating so you are able to give this your full attention.

Decarboxylate Kief For Edibles


OK here's a quick DIY and Why for decarboxylating kief for medibles.  The main reason to do so is by decarboxylating the kief you convert the THCA in THC which is activated for the body to process through oral administration (eating).  When I first began making my edible medicines I didn't know about this crucial step.  After all my hard work making my medibles sometimes they just didn't seem to kick. I did a little research and found that by decarboxylating the starting plant matter (in this case kief) you could convert the THCA to THC and make sure that your edibles were made with the fullest absorption into your body.

So here's how I do mine.  First using a kief box, shake out some kief from your buds or other plant matter.  For cooking it's ok if your kief material is yellow to yellow/green in color, so you may want to shake twice.  The first shake (yellow) you may want to save for smoking.  The second shake (yellow/green) you can use for all of your cooking needs.  Remove the kief from the base of your shake box and place in a baking pan.  Place this kief in a 200 degree oven for about 30 minutes.  Remove from the oven and allow to cool.  Now your kief is decarboxylated and ready to be added to all of your delicious medible recipes.  I store my decarboxylated kief in a small mason jar in a dark cupboard and use it as needed.'

Marijuana Infused BBQ Sauce


Ingredients:
  • 1 Cup of Kethchup
  • 2 Tablespoons of chive flower vinegar (you can make your own or substitute apple cider vinegar)
  • 1 tsp garlic granules
  • 1/2 tsp cumin
  • 1/2 tsp chili powder
  • 1 Tablespoon honey (I used a local buckwheat honey that is perfect for savory applications but you can use whatever kind of honey you prefer)
  • 1 Tablespoon Soy Sauce
  • 2 Tablespoons prepared yellow mustard 
  • 1 Tablespoon REAL maple syrup (don't substitute that awful "maple flavor" pancake syrup.  It's better to leave this ingredient out all together!)
  • 2 tsp Tapatio hot sauce (It's worth looking for this brand but you can substitute your favorite hot sauce)
  • 1 tsp of fresh ground pepper
  • 1 gram of activated kief 
    Makes approximately 8 ounces

  1. In a medium saucepan add all the ingredients listed and whisk together until well mixed.
  2. Heat to a boil over medium heat.  Stir constantly.  Do not allow your mixture to heat over 300 degrees or you will begin to degrade your medicine.
  3. Continue heating and stirring until your sauce changes from the bright red color of the ketchup into a deep orange red and begins to thicken.
  4. Bottle or jar up your sauce and store in the refridgerator.
  5. Yep, it's really this easy!  Now use your medicated BBQ sauce for a great dipping sauce, on burgers, steaks, chicken or anything else! 

Monday, May 11, 2015

Cannabutter Recipe

Follow the directions, and you will make the best butter your weed will allow. 

The truth is however, the butter is just as good as the weed you make it with. Some people like to make a mild butter and use it to spread on their toast in the morning or add a teaspoon or two to a baked potato. (If you go that potato route be sure to add some bacon bits and chopped scallion.)

But seriously, the stronger the weed the stronger the butter, so plan accordingly.

!!!! Use UNSALTED BUTTER !!!!!!

!!!
Decarboxylate Weed before starting step 1

Step 1
In a medium saucepan bring a quart of water to a boil on the stove. You can vary the amounts, just be sure that the marijuana is always floating about 1 1/2 – 2 inches from the bottom of the pan.
Step 2
 When the water is boiling place the butter in the pan and allow it to melt completely. My recipe uses 4 sticks of butter to every ounce of marijuana, so if you’re using a half ounce of weed that’s about 2 sticks of butter. So basically 7 grams per stick.

Step 3
Once the butter has melted you can add the marijuana. Once the weed is added the heat should be turned down, very low, to barely a simmer. I usually let the weed cook for around three hours. You can tell it’s done when the top of the mix turns from really watery to glossy and thick.

Step 4
While the cannabutter is cooking set up the bowl to hold the finished product. I like to use a heatproof bowl, and some people use a plastic food container. Place a double layer of cheesecloth over the top, and secure it with elastic, string or tape.

Step 5
Strain the marijuana butter over the bowl, carefully trying not to spill. When the saucepan is empty, undo the twine, pick up the cheesecloth from all four sides and squeeze out all of the remaining butter.

Step 6
Allow the cannabutter to cool for about an hour. Place in the fridge until the butter has risen to the top layer and is solid. The THC and other properties have attached to the butter, and you are just about there.

Step 7
Run a knife around the edge and lift the butter off. Place upside down on your work surface and scrape off any of the cooking water. Your cannabutter is ready to roll. Enjoy
!

Butterscotch Weed Blondie Brownies

Ingredients:

• 1 cup marijuana butter
• 4 cups brown sugar
• 4 eggs
• 1 teaspoon vanilla
• 2 cups unbleached white flour
• 1 teaspoon baking powder
• 2 teaspoons sea salt
• 2 cups chopped mixed nuts (unsalted)

Preparation Time: 30 minutes

Cooking Time: Preheat the oven to 350°F/177°C.
Bake for 45 minutes.

Yield: Using a 13” x 24” pan, cut into 24 equal pieces (approximately 4” x 3”), each serving has 2 teaspoons of butter = high dose, or cut into 48
pieces (about 2” x 3”) = medium dose.

Instructions:

This recipe is full of sugar—brown sugar, that is. It takes well to spelt flour or other alternatives to wheat flour. Be sure to experiment with a bit of your dough, and taste to make sure the flour alternative does not adversely affect the flavor of your recipe.  Melt the  Marijuana butter in a large saucepan.
Add the brown sugar, and stir until gloppy. Take off the heat immediately.
Place the saucepan on a hot pad and allow the mixture to cool slightly. Add the eggs slowly, making sure that the heat of the mixture does not coagulate the egg. Add the vanilla and mix thoroughly.

Add the flour, baking powder and salt and mix well. Stir in the chopped mixed nuts.

Pour into a greased 13 x 24-inch baking pan. 

Bake 45 minutes or until done. 

Do not overbake!

Marijuana Infused Fruit Roll-ups


Tired of candy and other sweets when really you just want a dose of medicine?  This recipe might help.

I'm going to share with you my recipe for Strawberry flavored Rhubarb and Red Pear fruit leather.  This is a hit with patients who are looking for something different and even a little healthy to eat as a medible. Because this recipe contains rhubarb as one of the main ingredients I have added some additional sugar to counteract the tartness found in the rhubarb.  Don't worry though, if you want to convert this you can easily substitute any fruit in the amounts listed in the recipe.  If you use a sweet fruit in season you may leave the sugar out entirely or you can reduce it to taste.  You may also substitute any desired sweetener for your dietary needs.  While fruit leather may sound daunting or complicated it's actually quite simple to make.  Let's get started!

What you will need:

  • A large stock pan
  • 2 greased cookie sheets with sides 
  • a blender (I like the stick type blender but you can use a counter top unit as well)
  • 2 Cups of coarsely chopped Rhubarb
  • 2 Cups of coarsely chopped Red D'anjo Pear with peel on
  • 1 1/3 Cup of water
  • 1 package strawberry flavor kool-aid (unsweetened)
  • 2.5 grams of decarboxylated kief (or add more or less for desired potency)
  • parchment paper for wrapping
  • kitchen shears
  • zip lock bags or other airtight container for storage
Instructions:
  1. In your stock pot combine the rhubarb, pears, water and sugar.  Place on stove top on medium heat.  Heat to a simmer stirring occasionally.  Cook for approximately 15-20 minutes or until your rhubarb is softened.
  2. Use your stick blender to process the contents of the pot into a nice puree constancy.  If you don't have a stick blender (immersion blender), pour the contents into your counter-top blender or food processor and pulse until you achieve a puree texture.  
  3. Add to your mixture 1 packet of strawberry flavored unsweetened kool-aid and your decarboxylated kief.  
  4. Again using your stick blender or counter top model pulse until everything is well blended.
  5. Divide your mixture into 2 equal 1/2s.  Pour 1/2 of the mixture onto each of your greased cookie sheets. Spread until it's evenly distributed on each sheet.
  6. Set your oven to 170F (or your oven lowest setting).  
  7. Place the pans in your oven.  Use a wooden spoon to keep the oven door a little bit gaped.  This will allow the moisture to leave the oven as your fruit mixture dehydrates.
  8. Now we wait.  I found the mixture takes anywhere from 6-12 hours to dehydrate in the oven.  You can check if it is done by attempting to peel up a corner of the fruit leather.  When it's done the leather will easily peel up.
  9. Once you've achieved the desired texture, remove the sheet pans from the oven and allow it to cool on your counter.
  10. When your mixture has cooled completely, score all around the edges of your sheet with a sharp knife.
  11. Tear off a piece of parchment paper approximately the same size as your cookie sheet.  Place this paper over the top of your fruit leather and use your hands to rub out any trapped air bubbles in the paper
  12. Starting in the corner, peel up your paper and fruit leather.  If you have scored the edges of your pan well you will be able to pull the whole sheet out in one big piece.
  13. place parchment side down on a clean work counter.  Using a sharp pair of kitchen shears cut your leather and parchment into 18 evenly sized pieces.  To prevent the scissors from sticking you can grease the blades with cooking oil or non stick spray.
  14. Place the cut leather pieces into individual zip-lock bags or stack them into an airtight container.
If dehydrated fully this leather can last for a very long time.  Store in a cool and dry place.  If you still have some moisture in your fruit leather you will want to store in an airtight container in your refrigerator.

** Variations for other fruits:  Simply substitute the fresh chopped fruit of your choice.  You can certainly use blends of fruit as well, just be sure that you have a total of 4 Cups of fresh chopped fruit.  Reduce the amount of sugar to taste and then follow the same instructions above.  Feel free to use an alternative sweetener such as maple syrup for this recipe.  Also if you don't want an artificial color/flavor you can make this without the kool-aid.  I mainly use the kool-aid flavoring when working with rhubarb because it mellows the sour/tart rhubarb flavor a bit.  When making with berries and other fruit I just allow the flavor of the fruit to shine through and eliminate the kool-aid from the recipe.

**Do not substitute wax paper for parchment paper.  The wax paper will absorb some moisture and become almost impossible to remove easily from the finished leather

**Alternative to cutting into rectangles you could use a cookie cutter to cut out fun shapes or you could cut out a long strip and roll it up to make a fruit roll-up

Mint Chocolate Chip Marijuana Cookie Recipe


This recipe uses a store bought pouch of cookies as part of the recipe, but what do I care? I just want to eat the final product!
Ingredients:
1/2 cup of marijuana butter
1 pouch (1 lb 1.5 oz) of store bought sugar cookie mix
1/4 to 1/2 teaspoons of mint extract
1 egg
1 cup creme de menthe baking chips
1 cup semisweet chocolate chips
Directions
Heat oven to 350°F.
Combine cookie mix, marijuana butter, mint extract and egg until a soft dough forms.
Stir in the creme de menthe baking chips and chocolate chips.
Place the cookie dough in small balls 2-3 inches apart on an ungreased cookie sheet.
Bake 8 to 10 minutes or until the edges of the cookies are browned.
Let the cookies cool on the pan for a few minutes before moving them to a wire rack.

Thursday, March 5, 2015

How to Decarboxylate Weed

Raw cannabis contains a lot of THCA which is not psychoactive (and what’s the fun in that?). When you smoke weed, the THCA molecule loses its carboxylic group (COOH) in the form of water vapor and carbon dioxide and becomes THC. Long story short, THCA becomes THC and your cannabis becomes psychoactive. This process is called decarboxylation or decarbing.

When you smoke or vaporize marijuana, the cannabis is decarbed by the heat. If you ingest cannabis and want the full psychoactive effect, you need to first decarb your cannabis before you cook with it.
Temperature
The lower the temperature, the longer it’s going to take to decarb your cannabis. Keep in mind that a lower temperature will allow you to lose less terpenes.
What are Terpenes?
Terpenes are the pungent oils that color your cannabis with distinctive flavors such as berry, mint, citrus and pine. There are many medicinal benefits to terpenes; some will successfully relieve your stress while others will promote focus and awareness.
Table: Decarboxylation Temperatures and Times
Temperature Heating Mode Plant Material Time Kief / Hash Time Cannabis Oil
310F Oven 10 - 18 minutes 5 - 10 minutes
250F Hot oil bath

Until bubbles taper off
240F Oven 50 - 60 minutes 30 - 40 minutes
212F Boiling water bath 90 minutes 90 minutes
Decarboxylation Methods:
Tip: Grind your cannabis first! A course grind will allow your weed to evenly dry without losing potency from over grinding.

Flower
  1. Preheat your oven (see table above). Use an oven thermometer to check the temperature.
  2. Sprinkle your cannabis in a pie plate and then cover it well with silver foil by crimping the foil along the edge of the plate.
  3. Place in the oven (see table above) – less time for older drier material, more for fresher material.
  4. After required time, turn the oven off, and remove cannabis. Let it cool down slowly before you unseal the container to allow any cannabinoid/terpenes vapor to reabsorb into the cannabis.

Keif/Hash
  1. Preheat oven (see table)
  2. Sprinkle hash/keif on pie plate, cover with silver foil and crimp foil along edge of plate. Place sealed dish in oven for (see table).
  3. Remove plate and let it cool down slowly without removing cover to allow any vapors to reabsorb into cannabis.

Boiling Bag method:
  1. Place the cannabis flower/keif/hash into a boilable cooking pouch. Seal it.
  2. Place in boiling water for 90 minutes. Make sure water does not boil dry.
  3. Take bag out of water. Let it slowly cool before opening.

Cannabis Oil
  1. Place heat proof container of cannabis oil into a cooking oil bath (canola oil works well). Heat cooking oil to 121C/250F.
  2. Stir cannabis oil to break up bubbles.
  3. Remove cannabis oil from heat when bubble formation starts to slow down — or leave on heat until all bubbles stop for increased sedative effect.